Wordlist Manipulator
=================
Post still to be fully completed
WLM WIKI
http://code.google.com/p/wordlist-manipulator/w/list
Google Code main page ;
http://code.google.com/p/wordlist-manipulator/
Video using WLM (old version v0.5) on BackBox ;
Wordlists are an integral part of many checks/audits and being able to ensure the wordlists meet your needs is imperative.
Of course when creating a wordlist you try to ensure that it is going to be as tailor made as possible, however sometimes you may want to adjust an existing wordlist to some extent.
WLM is a script which is basically bundling a whole load of text-processing commands into a menu structure to allow an easy overview of the most commonly used/requested wordlist alterations.
WLM was only made to work on linux based systems, it has been tested with good results on BackTrack and BackBox Linux but cannot advise whether it works on any other OS/Distro.
INSTALLATION
=============
BackBox Linux developer ZEROF has been kind enough to make a debian package for easy installation on BackBox Linux which can be installed on BackBox as below ;
Open terminal and type:
For BackTrack, simply download the script to a directory of your choice.
The script can then be run from that same directory with ./wlm
The code can be reviewed here ;
http://code.google.com/p/wordlist-manipulator/source/browse/wlm
Script (v0.7) can also be downloaded here ;
http://www.mediafire.com/file/p1tn76qw95hobi4/wlm
BASIC USAGE
============
If you have installed on BackBox with the debian package, then no need to do anything else.
wlm one
wlm ten
Or simply type wlm and hit Enter to get the main options menu.
wlm
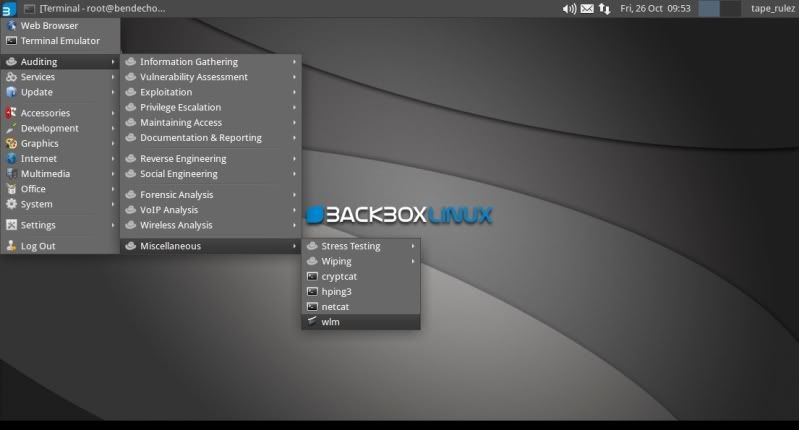
Or go to the BBox menu > Auditing > Miscellaneous > wlm
which will also give you the main options menu.
In BackBox you can also of course simply download the script, make it executable and run from the directory with ./wlm as well, same as you would in BackTrack ;
You can test all possible permutations of a word by typing ./wlm followed by a word (for instance 'one')
./wlm one
Or you can simply type ./wlm and hit Enter to get the main options menu.
./wlm

!NOTE!
If running BBox and possibly requiring to overwrite existing files, start wlm in terminal (not from menu) with;
sudo wlm
=================
Post still to be fully completed
WLM WIKI
http://code.google.com/p/wordlist-manipulator/w/list
Google Code main page ;
http://code.google.com/p/wordlist-manipulator/
Video using WLM (old version v0.5) on BackBox ;
Wordlists are an integral part of many checks/audits and being able to ensure the wordlists meet your needs is imperative.
Of course when creating a wordlist you try to ensure that it is going to be as tailor made as possible, however sometimes you may want to adjust an existing wordlist to some extent.
WLM is a script which is basically bundling a whole load of text-processing commands into a menu structure to allow an easy overview of the most commonly used/requested wordlist alterations.
WLM was only made to work on linux based systems, it has been tested with good results on BackTrack and BackBox Linux but cannot advise whether it works on any other OS/Distro.
INSTALLATION
=============
BackBox Linux developer ZEROF has been kind enough to make a debian package for easy installation on BackBox Linux which can be installed on BackBox as below ;
Open terminal and type:
wget http://wordlist-manipulator.googlecode.com/files/wlm-0.8_all.deb
sudo dpkg -i wlm-0.8_all.deb
To use the tool type wlm in a terminal or open BackBox menu -> Auditing -> Miscellaneous -> wlm
For BackTrack, simply download the script to a directory of your choice.
After having downloaded the code and saved as 'wlm', the file needs to be made executable as follows ;
chmod +x wlmThe script can then be run from that same directory with ./wlm
The code can be reviewed here ;
http://code.google.com/p/wordlist-manipulator/source/browse/wlm
Script (v0.7) can also be downloaded here ;
http://www.mediafire.com/file/p1tn76qw95hobi4/wlm
BASIC USAGE
============
If you have installed on BackBox with the debian package, then no need to do anything else.
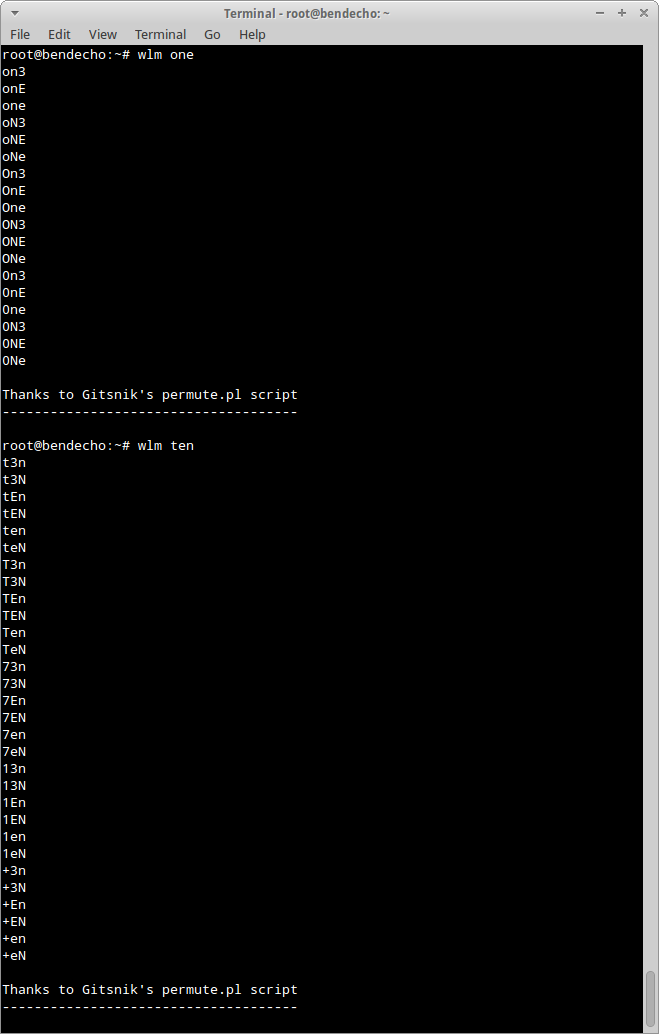
For use in BackBox when installed using the debian package, simply type 'wlm' followed by a word to give all possible permutations of that word ;
wlm one
wlm ten
Or simply type wlm and hit Enter to get the main options menu.
wlm
Or go to the BBox menu > Auditing > Miscellaneous > wlm
which will also give you the main options menu.
In BackBox you can also of course simply download the script, make it executable and run from the directory with ./wlm as well, same as you would in BackTrack ;
You can test all possible permutations of a word by typing ./wlm followed by a word (for instance 'one')
./wlm one
Or you can simply type ./wlm and hit Enter to get the main options menu.
./wlm
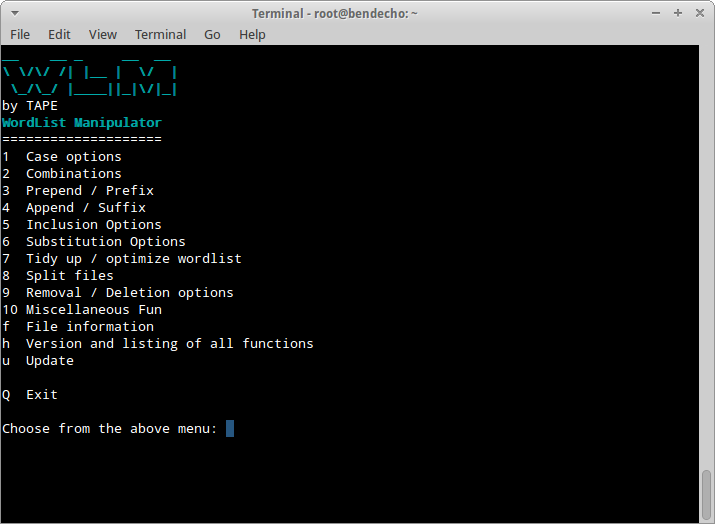
ALL OPTIONS
============
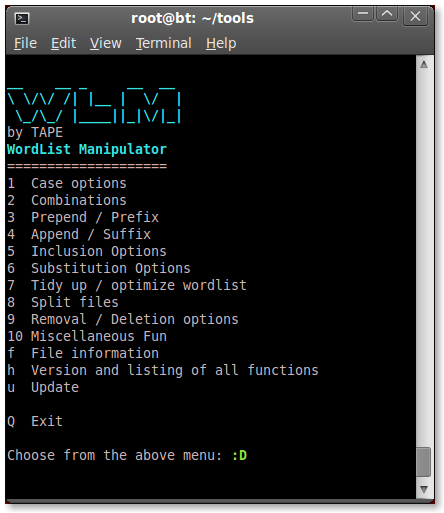
Each main option has a submenu and the full range of options are ;
1. Case Options;
1.1 Change case of first letter of each word in the wordlist.
1.2 Change case of last letter of each word in the wordlist.
1.3 Change all lower case to upper case.
1.4 Change all upper case to lower case.
1.5 Invert case of each letter in each word.
2. Combination options;
2.1 Combine words from 1 list to all words in another list.
2.2 Combine all wordlists in a directory into 1 wordlist.
3. Prefix characters to wordlist;
3.1 Prefix numeric values in sequence (ie. 0-999)
3.2 Prefix fixed number of numeric values in sequence (ie. 000-999)
3.3 Prefix a word or characters to wordlist.
4. Append / Suffix characters to wordlist;
4.1 Suffix numeric values in sequence (ie. 0-999)
4.2 Suffix fixed number of numeric values in sequence (ie. 000-999)
4.3 Suffix a word or characters to wordlist.
5. Include characters;
5.1 Include characters from a certain postion from start of word.
5.2 Include characters from a certain postion from end of word.
6. Substitute/Replace characters;
6.1 Substitute/Replace characters from start of word.
6.2 Substitute/Replace characters from end of word.
6.3 Substitute/Replace characters at specified positions in list.
7. Optimize / tidy up wordlist;
7.1 Full optimization of wordlist.
7.2 Optimize for WPA (min 8 chars max 63 chars).
7.3 Sort words based on wordlength
(can help process speed with some programmes such as cRARk)
8. Split options;
8.1 Split wordlists based on a user defined max linecount in each slit file.
8.2 Split wordlists based on a user defined max size of each split file.
9. Removal / Deletion options;
9.1 Remove characters at a certain position from start of word.
9.2 Remove characters at a certain position before end of word.
9.3 Remove specific characters globally from words.
9.4 Removing words containing specific characters from wordlist.
9.5 Remove words with more than X number of identical adjacent characters from wordlist.
9.6 Remove words existing in 1 list from another list (test version only for small lists).
9.7 Remove words that do not have X number of numeric values.
9.8 Remove words that have X number of repeated characters.
9.9 Remove words of a certain length.
10. Miscellaneous fun;
10.1 Check possible wordlist sizes (with same min-max length only).
10.2 Create a wordlist from a range of dates (datelist).
10.3 Strip SSIDs from a kismet generated .nettxt file.
10.4 Basic leetify options for wordlist.
10.5 Leetify/Permute wordlist (Gitsnik's permute.pl script).
f. File information;
Gives information on aspects of selected file ;
- Filetype
- Wordcount of file
- Longest line
- File Size
- first 3 and last 3 lines of file
h. Version and help information.
u. Check for updates to the script.
GENERAL USAGE
================
Choose the desired option and the submenu option as appropriate.
You will be prompted to enter the /path/to/wordlist which you want to modify
There is no auto-complete on this, so the correct path syntax and correct spelling is imperative !
You will then be prompted to specify a filename for the resulting altered wordlist.
again, there is no auto-complete on this, so the correct path syntax and correct spelling is imperative !
(You can actually also browse to the wordlists in File Manager and drag and drop in the wlm terminal)
Depending on the option chosen, you may be prompted for more input.
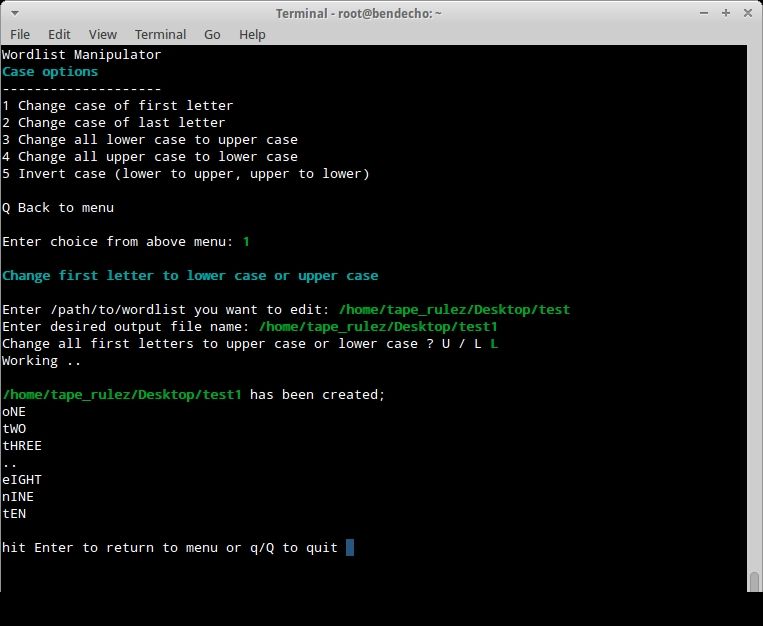
In the below example, have chosen Option 1 (Case Options) followed by Sub-Menu option 1 (Change case of first letter)
The principal for all other options from 1 - 9 is the same ;
> Enter filename to be altered
> Enter output filename
> Provide further input as prompted/required.
Should you risk overwriting an existing file, then wlm will warn you of this so you can cancel without making any changes.
!NOTE!
If using BBox and if you may be overwriting files, then wlm may require to be run as root !
(BackTrack runs root as standard, so no special measures required when using in BackTrack)
If running BBox and possibly requiring to overwrite existing files, start wlm in terminal (not from menu) with;
sudo wlm